Turning Off User Account Control
User Account Control aims to improve the security of Microsoft Windows by limiting application software to standard user privileges until an administrator authorizes an increase in privilege level. This is a similar concept to windows server Data Execution Prevention. To install eClaims it’s necessary to turn this feature off.
Method 1: Using Control Panel
Click Start and the open Control Panel
In the Control Panel, click User Accounts and Family Safety
Click User Accounts
Click Turn User Account Control on or off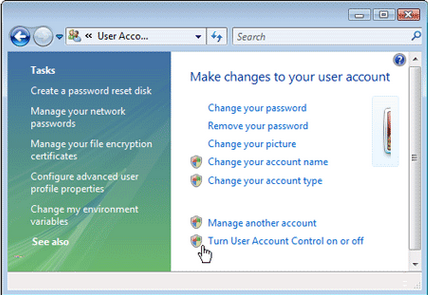
Clear the tick or check mark on the box beside the Use User Account Control (UAC) to help protect your computer option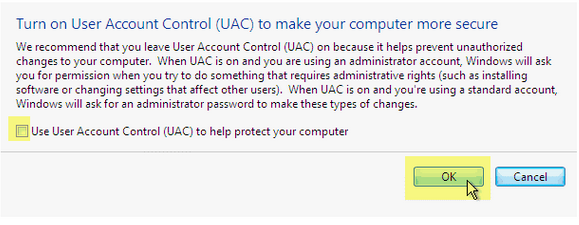
Click OK
When prompted, restart the computer. Note that the changes will affect all users on the computer.
To enable the UAC, simply tick or select the checkbox again
Method 2: Using Registry Editor
Note – This should only be performed by the IT Administrator
Run Registry Editor by typing “regedit” in Start Search or command prompt
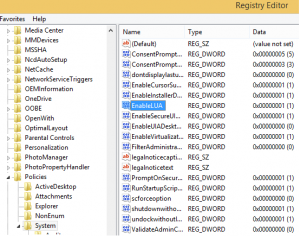
In Registry Editor, navigate the following registry key: i. HKEY_LOCAL_MACHINE\Software\Microsoft\Windows\CurrentVersion\Policies\System
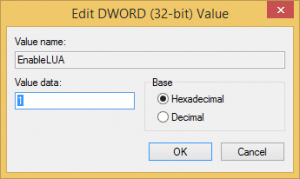
Locate the following DWORD registry subkey in the right pane: EnableLUA
Right click and choose modify or double click EnableLUA to modify the setting. On value prompt, set the new value to 0.
Exit from Registry Editor
Restart the computer
To enable the UAC again, simply change back the value of EnableLUA to 1
Method 3: Using MsConfig System Configuration
Run MsConfig from Run
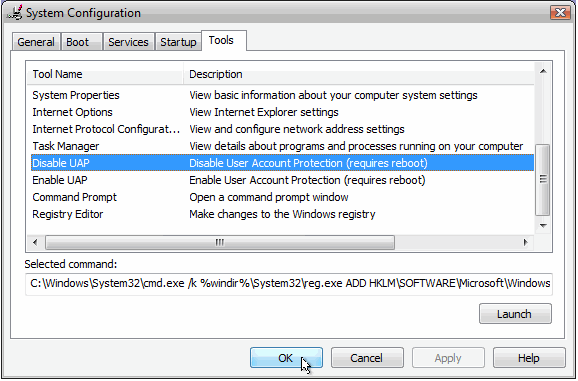
In System Configuration window, click on the Tools tab
Scroll down and locate “Disable UAP” or “Disable UAC” option item. Click on that line.
Click the Launch button
A command prompt window will open and automatically execute and run a process to disable UAC
Close the CMD window when done
Close MsConfig
Restart the computer for changes to be applied.
To re-enable UAC, simply select “Enable UAP” or “Enable UAC” instead of “Disable UAP” or “Disable UAC”, and then click the Launch button

