Assigning a Doctor in the Scheduler
If you have a regular roster of doctors you can add them to the scheduler.
To add a doctor to the schedule go to the main menu.
eClaims opens at the main menu. To get to the main menu from any screen in eClaims just click the escape key on the keyboard a few times to go to the previous screen until you arrive at the main screen.
Click Maintenance and Business Data.
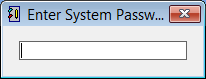
You’ll be prompted to enter the system password.
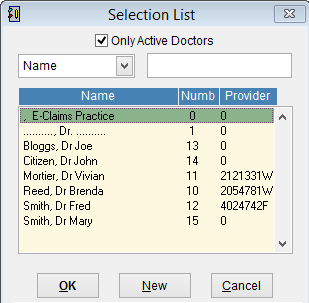
Double click on the doctor from the Selection List.
Click Scheduler Config.

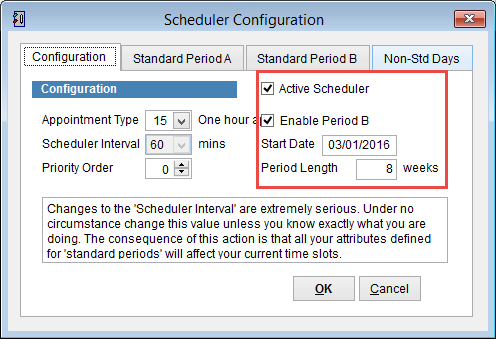
The Scheduler Configuration screen is used to display the appointments that will be assigned for the doctor on a given day. Its also possible to setup an alternating schedule where period A is set for a certain mix of appointments and period B for another. An example might be that a doctor comes to the practice every second week and works Monday to Friday.
It also has the ability to block particular dates such as public holidays or vacation periods through the Non-Standard Days tab.
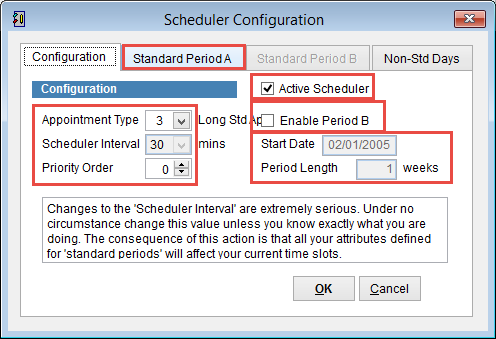
Appointment Type displays the number and description of the selected appointment. To change the Appointment Type just click on the dropdown arrow and select it from the list.
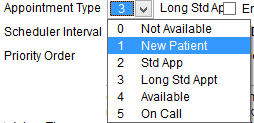
If the doctor has different types of appointments in the same day eClaims can manage this by repeating the process of allocating appointments or just modifying the appointments once they have been set. It’s also possible to modify a specific appointment in the scheduler and set it to another type if necessary.
Scheduler Interval is the length of the appointment
Priority Order is the priority of the appointment if there is a conflict in the schedule. If two appointments are scheduled at the same time and both have a priority of 1 then both will be displayed in the schedule. This could be useful if the doctor is available for different types of appointments such as New Patients and follow Ups but wants a visual record to follow.
![]()
Active Schedule is used to set the schedule to active/ inactive. If the tick is removed from Active Schedule it will not be displayed in the scheduler.
Enable Period B allows you to set an alternating schedule. Imagine that the doctor works every second Monday from 9.00 – 13.00 only.
Start Date is the start date of Period A.
Period Length is the length in weeks of period B.
Click OK to continue or Cancel to discard changes and return to the previous screen.
Click Standard Period A to add the appointment to the doctor in Scheduler.
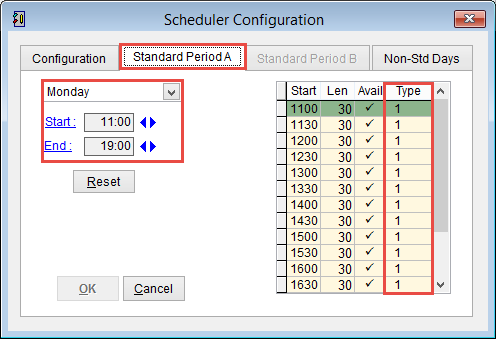
Select the day of the week and the hours that the doctor will be available. Imagine the doctor works on Monday from 11.00 – 19.00 and takes a one hour break between 13.00 – 14.00.
First Set the start and finish times to match the hours of the doctor. IE 11.00 – 19.00.
![]()
Click on the arrows next to the time to increase or decrease the time until you have the correct times selected.
Click Reset to reset the table and add it to the schedule.
On the right side of the screen you should now see the appointments.
The doctor will be away for lunch between 13.00 – 14.00. Move your mouse over the Type column at 13.00 and right click.
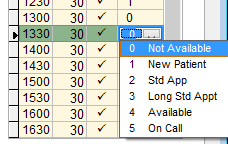
Select 0 Not Available from the list.
Repeat the same steps at 13.30.
The doctor will now be listed in the scheduler available from 11.00 – 19.00 with 13.00 – 14.00 displayed as not available.
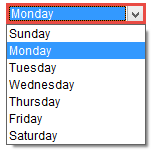
To change the day of the week click on the day field and select the next day from the drop down menu.
Remember – When you set an appointment range click Reset for the changes to be applied.
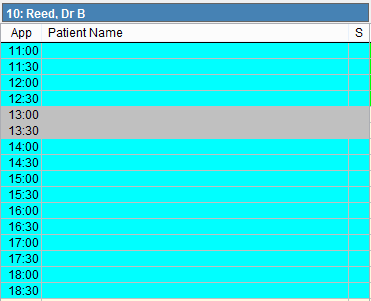
In the scheduler we can see Dr Reed is scheduled every Monday from 11.00 – 19.00 but not available from 13.00 – 14.00.
For more information on the scheduler please refer to The Scheduler
Lets imagine the situation that Dr Reed works from 11.00 – 19.00 on the first and third Monday of the month and 11.00 – 15.00
the second and fourth Monday of the month.
Click Enable Period B
Enter the start date of Period B
Enter the Period Length in weeks that each period will last.

Click the Standard Period B tab at the top of the screen.
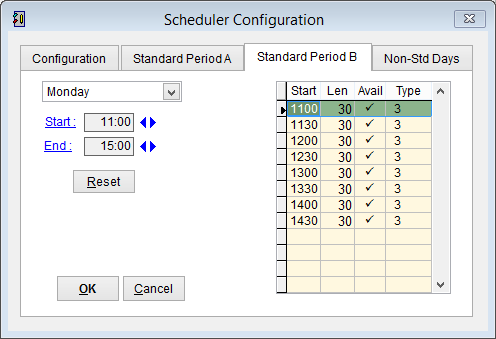
Enter the Start and End times.
![]()
Click on the arrows next to the time to increase or decrease the time until you have the correct times selected.
Click Reset for the changes to be applied to the scheduler.
Non-Std Days
Non-Standard days is used to add a specific day to the scheduler that is unique. It may be that the schedule will be different for one specific day, public holidays or vacations.
Click on the Non-Std Days tab at the top of the screen.
Enter the date under From.
![]()
If it is only for part of the day select the Start and End times using the arrow buttons.
![]()
If the doctor is away for the day click on Absent days at the bottom of the screen.
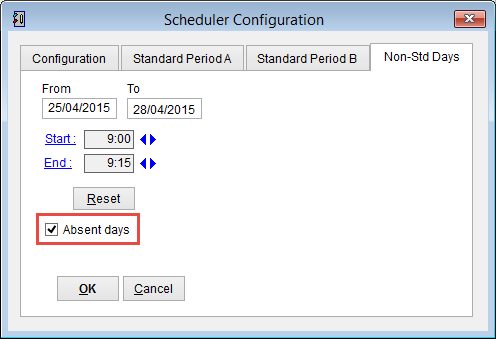
If for more than one day set the To date for the days that the doctor is not available.
![]()
Don’t forget to click Reset to save the changes.
Click OK to close the screen and Cancel to discard the changes and return to the previous screen.
Example
A doctor works for 8 weeks Monday to Friday from 8.00 – 20.00 and the next 8 weeks the doctor is away.
In the scheduler configuration click Enable Period B.
Enter the start date of the schedule and click enter on the keybaord.
The schedule always begins on a Sunday. If the selected date isn’t a Sunday the system will select the Sunday before the date entered.
Set the Period length to 8 weeks. This means that for the first 8 weeks starting on the 3rd of January 2016 Standard Period A will be displayed in the scheduler for this doctor. IE from the 4th of January 2015 to the 28th of February 2015. Standard Period B will be displayed in the scheduler from the 1st of March 2015 to the 25th of April.
If a doctor works the first 8 weeks of the year but not the following 8 weeks, set the hours under Period A and don’t enter anything for Period B.
The scheduler will add the doctor from the 4th of January to the 28th of February but will not be displayed from the 1st of March to the 25th of April.