eClaims Client Installation Guide
This tutorial will help you install the eClaims client on a PC. This must be used in a network where the eClaims server is already installed on a server.
Preparation Requirements
Before attempting the installation please ensure that you have the following :
Download the client installation file from acsshealth.com/installs/disk1ecclient.exe
Get the computer name of the machine and the directory where the eClaims Server is installed
Ensure you are logged into the computer with Administrator permissions
eClaims Client Installation
Insert the installation CD or install the downloaded file.
| Click InstallNote : By default the destination folder is set to the local drive ‘C:\’ | 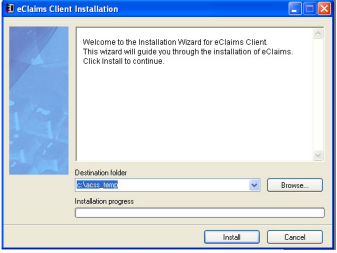 |
| Click Next | 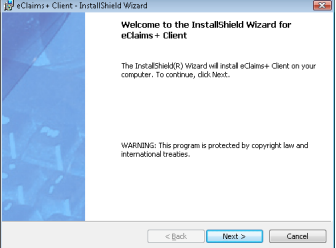 |
| Select I accept the terms in the license agreement.Click Next | 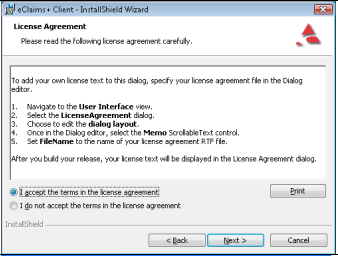 |
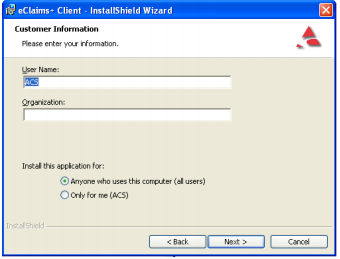
Click Next
Note : If ‘Anyone who uses this computer (all users)’ is greyed out or not there Cancel the installation and log in as a user with administrator privileges.Normally Anyone who uses this computer (all users) should be selected. |
 |
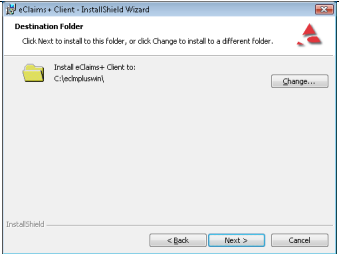
Make sure the path is set to “C:\ECLMPLUSWIN”
Note : To change the path, click on Change enter the path and click OK.Click on Next |
 |
| Specify the path of the machine in which eClaims Server is installed.Click Change |  |
| In the Folder Name field enter the path of the eclmpluswin folder on the server. IE ‘\\server\eclmpluswin\’.Click OK | 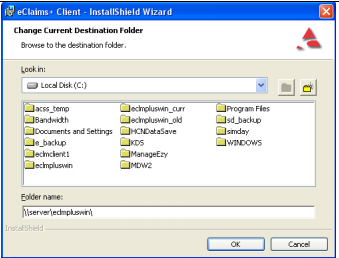 |
| The selected path should be displayed on the installation screen.Click Next | 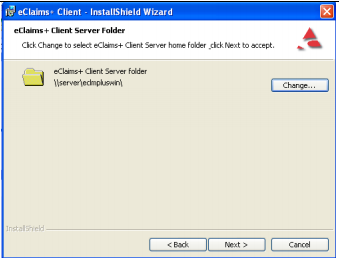 |
| Click Complete and then Next at the bottom of the screen. | 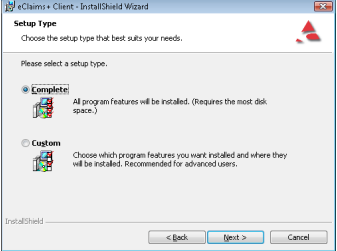 |
| Click Install | 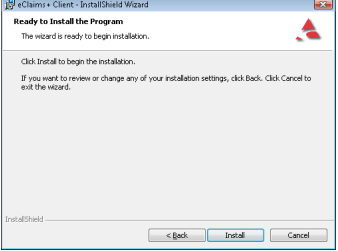 |
| The application will now be installed | 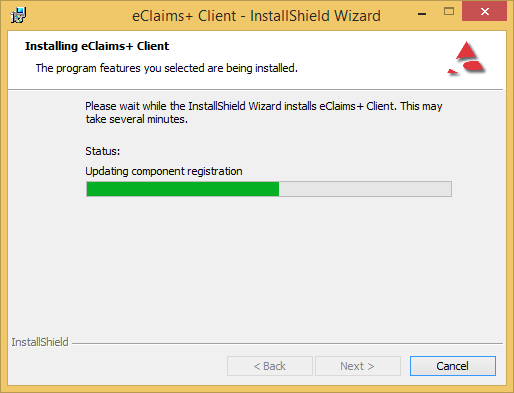 |
| Click on Finish | 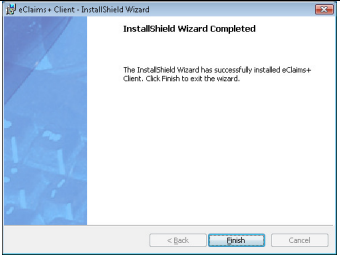 |
| Check the shortcut settingsRight click on the eClaims shortcut on the desktop. Select Properties to open see the details of the shortcut.The path specified under Target is the path to the eClaims server.Click Open File Location to open the eClaims server folder in windows explorer. | 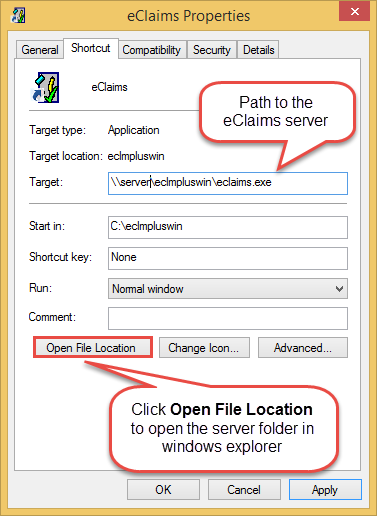 |
| Run the shortcut eClaims + Client application on the desktop.NOTE: Make sure to run the shortcut as Administrator so that it has the highest privileges to set up all the required application. | |
| The first time you run the application this screen will appear. Click OK to continue. eClaims will close. Run the shortcut eClaims + Client application on the desktop again | 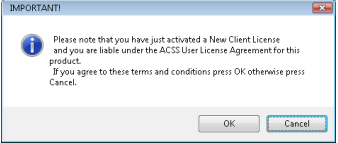 |
| This internet link will open automatically showing details of the software update. Close this webpage. | 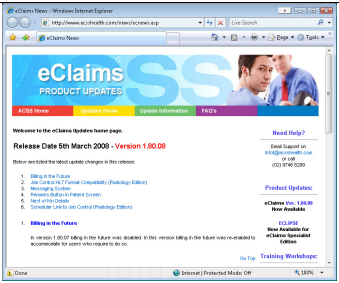 |
| eClaims will automatically run through this process of updating the Java application.Click OK | 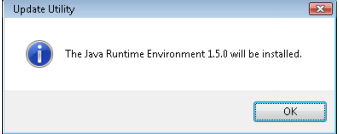 |
| The application will automatically run through this process.Click OK | 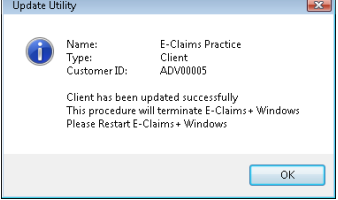 |
| The application will automatically run through this process.Click OK | 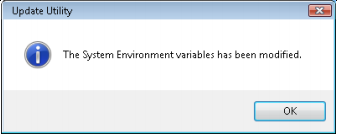 |
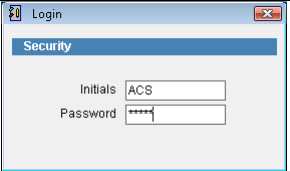
| Run ‘eClaims + Client’ from the desktop.By defaultInitials = ACS Password = ADMIN |
 |
| eClaims is now ready to use | 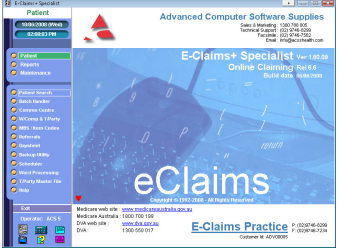 |