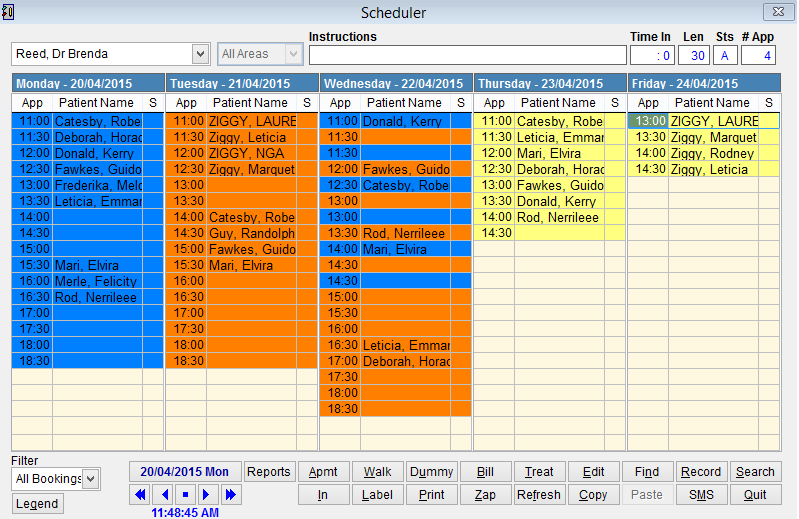
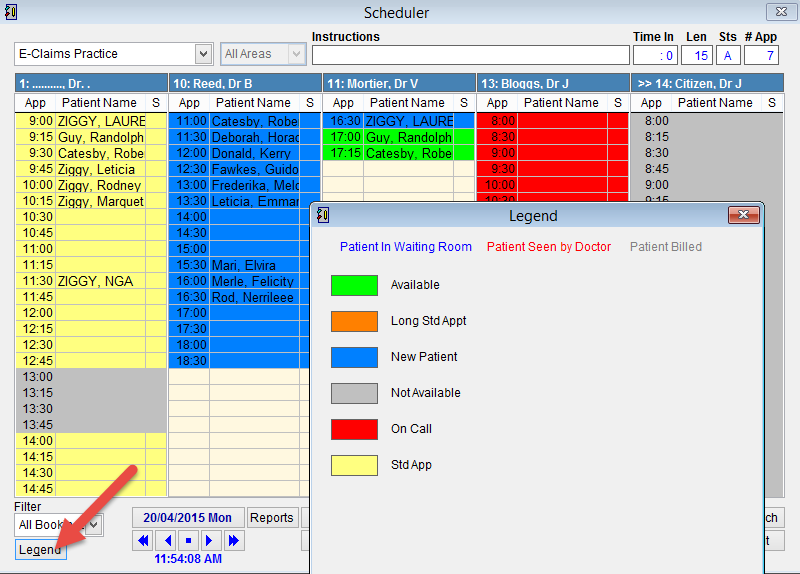
Scheduler
The Scheduler makes patient appointments and billing.
Appointments are placed under a specific doctor or room.
The scheduler also displays the status of the patient and can be used to verify if the patient has been billed.
To open the scheduler go to the main menu, click Patient and Scheduler from the menu on the left side of the screen.
Scheduler Views
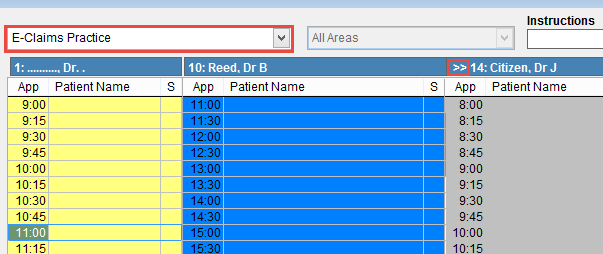
By default the scheduler will display up to 5 schedules for the current day. If there are more than 5 active schedules click ![]() on the right side of the screen to see the next schedule.
on the right side of the screen to see the next schedule.
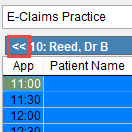
Click ![]() to move the display to the left.
to move the display to the left.
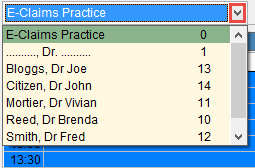
To see an individual schedule click on the drop down arrow next to the display name in the top right corner of the screen and click on the name you want to see.
eClaims can be set to display the schedule of just one doctor by default for a specific user. Refer to Security Area for more information.
Not sure what all the colours mean. Click Legend at the bottom of the screen to see the colour coding rules.
Want to modify the legends and colours. Click here Legend Selection List.
Calendar
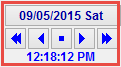
When you open the scheduler it displays the current date and time at the bottom of the screen. Selecting the arrow keys below the date will move the calendar forward or back by a day or a week.
Click on the ![]() icon to move forwards or backwards in the calendar by one day.
icon to move forwards or backwards in the calendar by one day.
Click on the ![]() icon to move forwards or backwards in the calendar by one week.
icon to move forwards or backwards in the calendar by one week.
Click the ![]() icon to return to the current date.
icon to return to the current date.
Click on the date to open the a full calendar display if you want to select a date directly. For more information on this refer to Select Scheduler Date.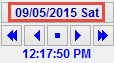
Time Menu

Time In is the time that the patient arrived.
Len is the scheduled length of the patient appointment
Sts is the patient status
#App is the appointment type.
![]()
Scheduler bottom menu
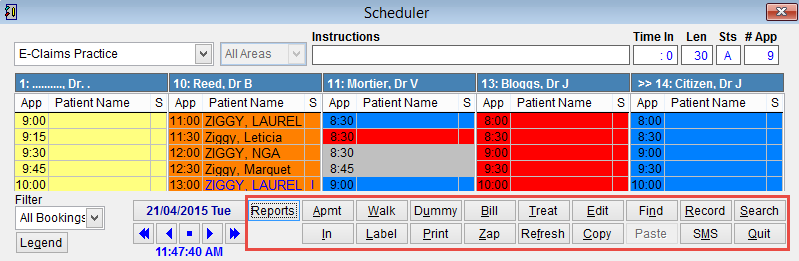
![]()
| Reports | Click on a patient in the schedule and click reports to open the Word Processing Screen |
| Apmt | Opens the Patient Lookup screen to make an appointment |
| In | Select a patient in the schedule and click In to indicate they are in the waiting room. The entry will change colour and add I under the status heading |
| Walk | Walk-in. Opens the patient search screen and adds an appointment to the next available slot in the schedule to the first available doctor. |
| Label | Prints a patient label |
| Dummy | Enters a dummy appointment in the selected schedule. The status colour is changed to Not Available. |
| Opens the Daily Scheduler Print List screen. | |
| Bill | Select a patient in the scheduler and click Bill to open the billing screen. |
| Zap | Delete the selected entry |
| Treat | Select a patient in the schedule and click Treat to open the Patient Treatment Screen. |
| Edit | Edit the selected appointment |
| Copy | Copy the selected entry. You can now paste an additional appointment into the schedule by clicking on the desired time and click paste. |
| Find | Look for an appointment in the schedule. Opens the Scheduler Find screen. |
| Paste | Paste an appointment that you have copied into the schedule. You will now have 2 appointments in the schedule. |
| Record | Opens the Patient Screen for the selected patient. |
| SMS | Opens the SMS screen |
| Search | Opens the search available appointment screen |
| Quit | Closes the scheduler and returns to the main menu |
Click here for How to book a patient appointment.